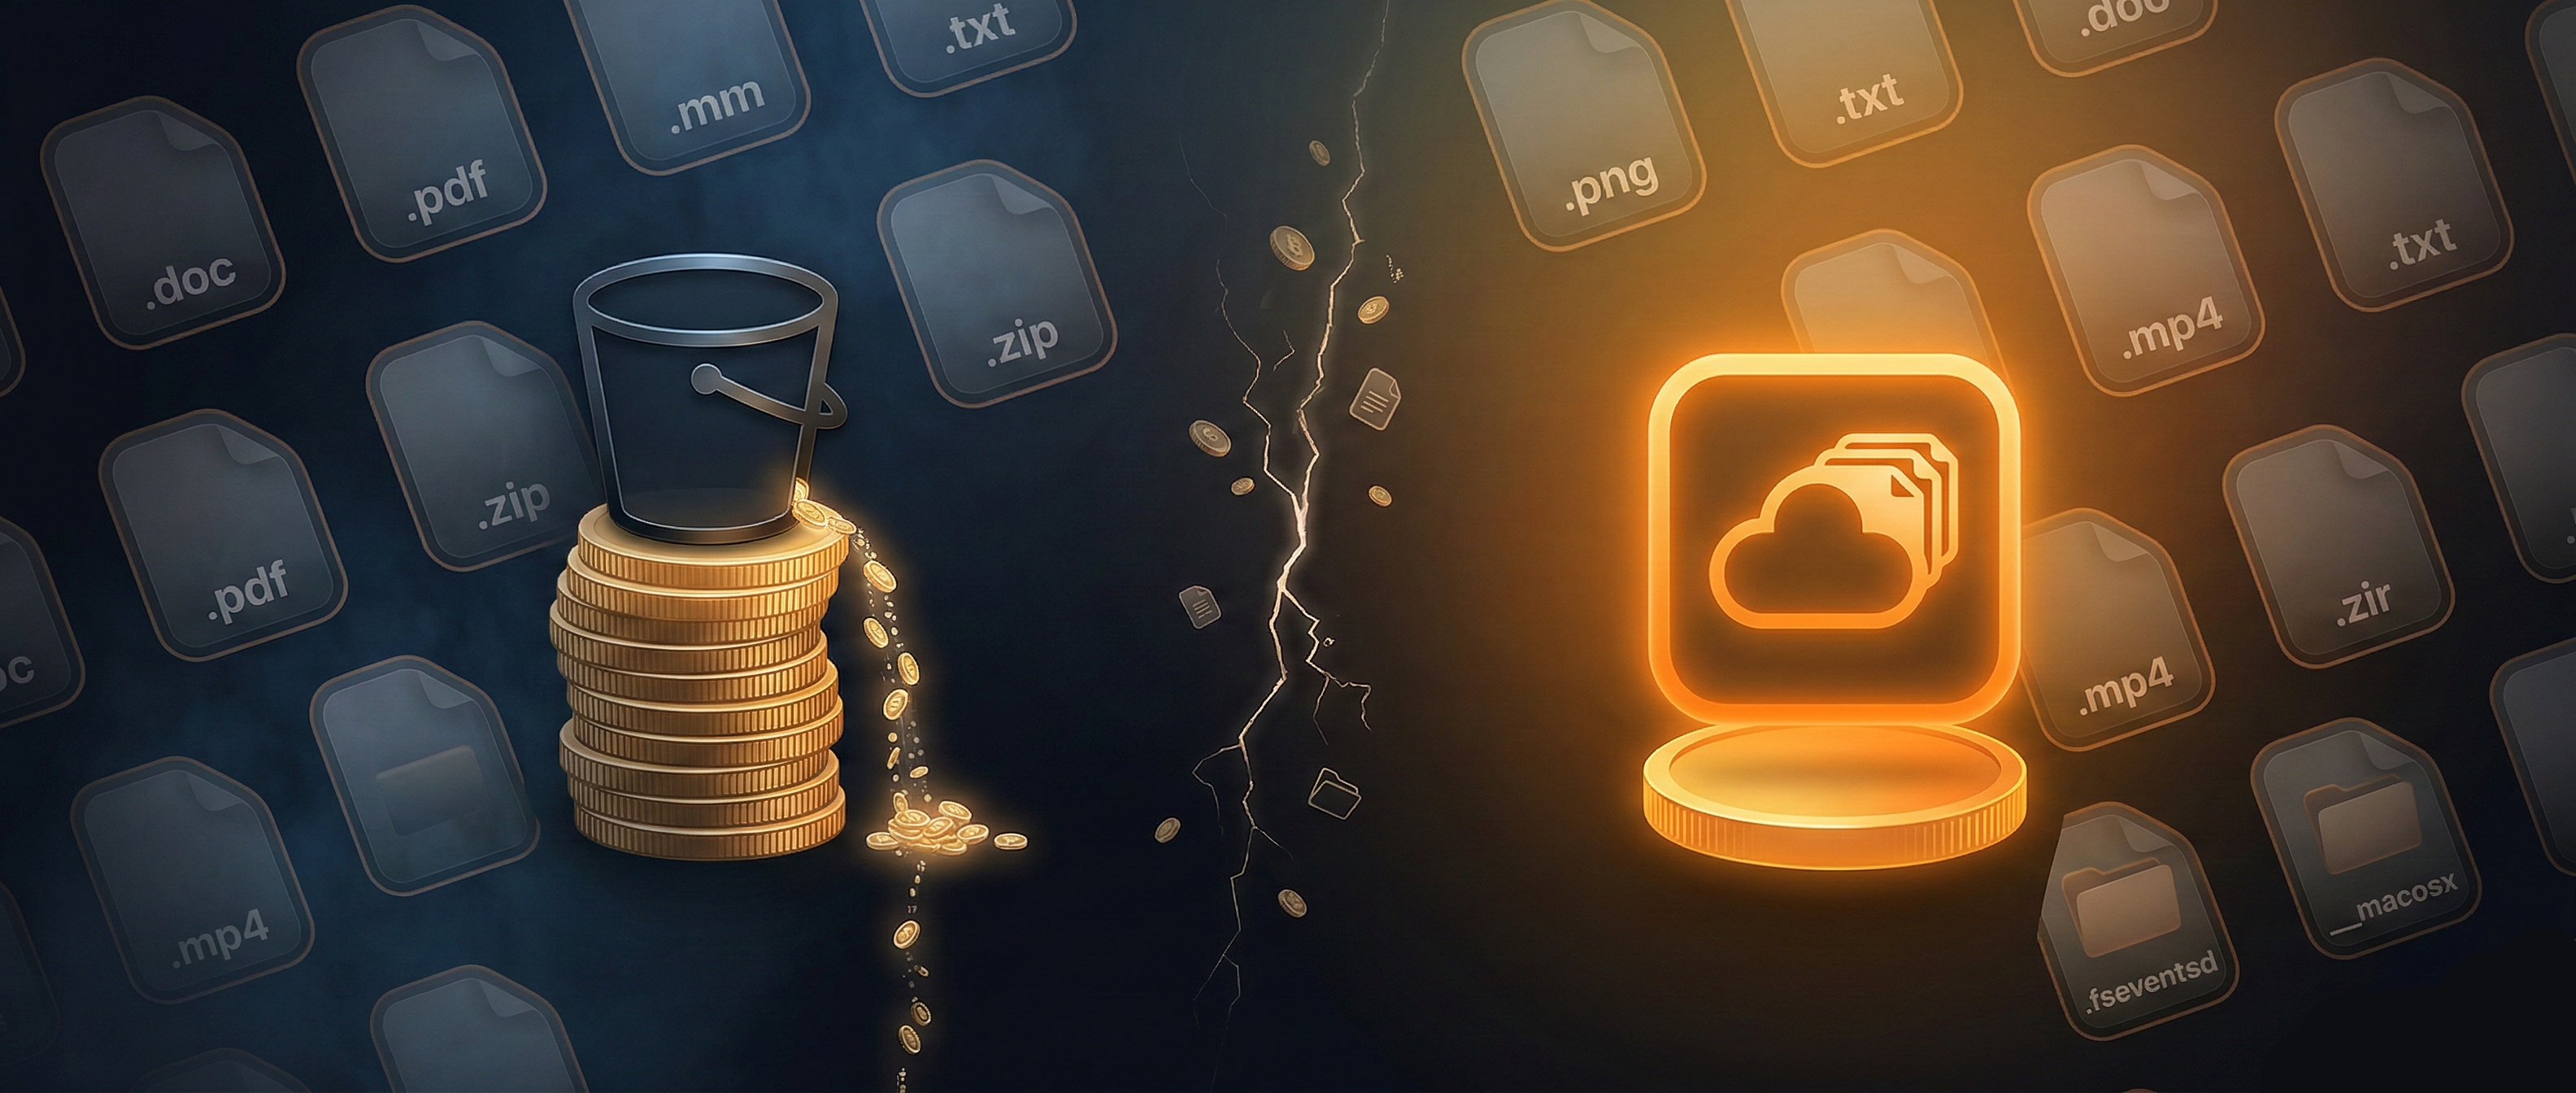
Cloudflare R2 is S3-compatible object storage with one remarkable property: zero egress fees. Every byte you serve from S3 or Google Cloud Storage costs money in outbound transfer. R2 charges nothing for that. When you combine R2 with Cloudflare's global edge network, you get a fully functional CDN for images, JavaScript bundles, CSS files, videos, and build artifacts — at a fraction of the cost of CloudFront or any traditional CDN.
This guide walks through the complete setup: making your R2 bucket publicly accessible, connecting a custom domain, configuring caching rules, and using R2Drop to push assets from your Mac with a single right-click.
Why R2 Works Well as a CDN
Traditional CDN setups involve two separate bills: one for origin storage (S3, GCS) and one for the CDN layer (CloudFront, Fastly, Cloudflare CDN fronting S3). Egress charges stack up quickly at scale. A site serving 10 TB per month from S3 via CloudFront easily costs $900–$1,200 in transfer fees alone.
R2 changes the math entirely. Because R2 lives inside Cloudflare's network, requests served through Cloudflare's edge never generate egress charges — Cloudflare treats R2-to-edge traffic as internal. You pay only for storage ($0.015/GB/month) and operations (Class A writes at $4.50 per million, Class B reads at $0.36 per million). For most static asset workloads, that's effectively free at modest scale.
The architecture is simple: your files live in R2, Cloudflare routes requests through its global edge network, and visitors get assets served from the nearest Cloudflare data center with full HTTP/2 and automatic gzip/Brotli compression.
Architecture Overview
Here is how the pieces connect:
- R2 bucket — stores your actual files (images, JS, CSS, videos, fonts)
- Cloudflare DNS — your custom domain (e.g.,
cdn.yourdomain.com) points to your R2 bucket via a CNAME record that Cloudflare manages internally - Cloudflare edge network — intercepts requests to your custom domain, serves cached assets from the nearest PoP, and only fetches from R2 on a cache miss
- Cache Rules — you control TTLs per file type, ensuring CSS and JS are cached aggressively while HTML stays fresh
Requests never leave Cloudflare's network to reach R2. The round-trip for a cache miss goes from visitor → Cloudflare PoP → R2 (internal Cloudflare transfer) → back to visitor. This is substantially faster and cheaper than visitor → CloudFront PoP → S3 (public internet transfer).
Step 1: Create a Public R2 Bucket
Log in to your Cloudflare dashboard at dash.cloudflare.com and navigate to R2 Object Storage in the left sidebar.
Click Create bucket and give it a name. Bucket names must be lowercase, alphanumeric, and can include hyphens — something like assets-yoursite works well. Choose the storage region closest to your origin server if you have a preference, or leave it on Automatic.
Once created, open the bucket and go to the Settings tab. Scroll to the Public access section and click Allow Access. Cloudflare will warn you that files in this bucket will be publicly readable — confirm to proceed.
At this point, Cloudflare gives you a default public URL in the format:
https://pub-<hash>.r2.dev/<filename>This works, but it's not brandable and doesn't use your domain. The next step fixes that.
Step 2: Connect a Custom Domain
Custom domains are how you turn your R2 bucket into a proper CDN endpoint at a URL like https://cdn.yourdomain.com/logo.png. This requires that your domain's DNS is managed by Cloudflare — if it isn't yet, you'll need to transfer or add your domain to Cloudflare first.
With your bucket open in the Cloudflare dashboard, click the Settings tab, then scroll to Custom Domains and click Connect Domain.
Enter the subdomain you want to use, for example cdn.yourdomain.com. Cloudflare will automatically:
- Create a CNAME DNS record pointing
cdn.yourdomain.comto your R2 bucket's internal endpoint - Issue and manage a TLS certificate for your subdomain via Cloudflare's Universal SSL
- Route all requests through Cloudflare's edge — so caching and compression work automatically
It takes about 60 seconds for the DNS record to propagate within Cloudflare. Once active, any file you upload to your R2 bucket is immediately accessible at https://cdn.yourdomain.com/<filename>.
If you organize assets into folders (e.g., images/, js/, css/), the URLs follow the same path structure:
https://cdn.yourdomain.com/images/hero.jpg
https://cdn.yourdomain.com/js/app.v2.min.js
https://cdn.yourdomain.com/css/styles.min.css
Step 3: Configure Caching
By default, Cloudflare caches responses from your R2 custom domain based on the Cache-Control header on each object. If you don't set a Cache-Control header when uploading, Cloudflare falls back to a short default TTL. You want explicit control over this.
Setting Cache-Control headers on upload
When uploading assets, set Cache-Control: public, max-age=31536000, immutable for versioned assets (JS/CSS bundles with content hashes in their filenames). For assets that may change, use a shorter TTL like max-age=86400. The immutable directive tells browsers and CDN caches that the file will never change, enabling more aggressive caching.
With R2Drop's CLI, you can set metadata headers on upload:
r2drop upload dist/app.v2.min.js \
  --bucket assets-yoursite \
  --prefix js/ \
  --header "Cache-Control: public, max-age=31536000, immutable" \
  --header "Content-Type: application/javascript"
Cloudflare Cache Rules
For more granular control, you can use Cache Rules in the Cloudflare dashboard (under your domain → Caching → Cache Rules). Cache Rules let you set TTLs based on URL patterns, file extensions, or request headers — without changing your upload process.
A useful rule for a CDN bucket: match requests where the hostname is cdn.yourdomain.com, then set Edge TTL to 1 year and Browser TTL to 1 day. This ensures Cloudflare edge nodes hold assets for a full year (reducing R2 read operations to near zero after warmup), while browsers revalidate daily.
For cache-busting, rely on filename versioning (content hashes) rather than query strings. Query strings can interfere with cache key matching and result in unnecessary cache misses.
Step 4: Upload Assets with R2Drop
This is where the workflow becomes genuinely fast. Once your bucket is configured and your custom domain is live, you need a way to push files without opening the Cloudflare dashboard every time. R2Drop handles this from your Mac's Finder or terminal.
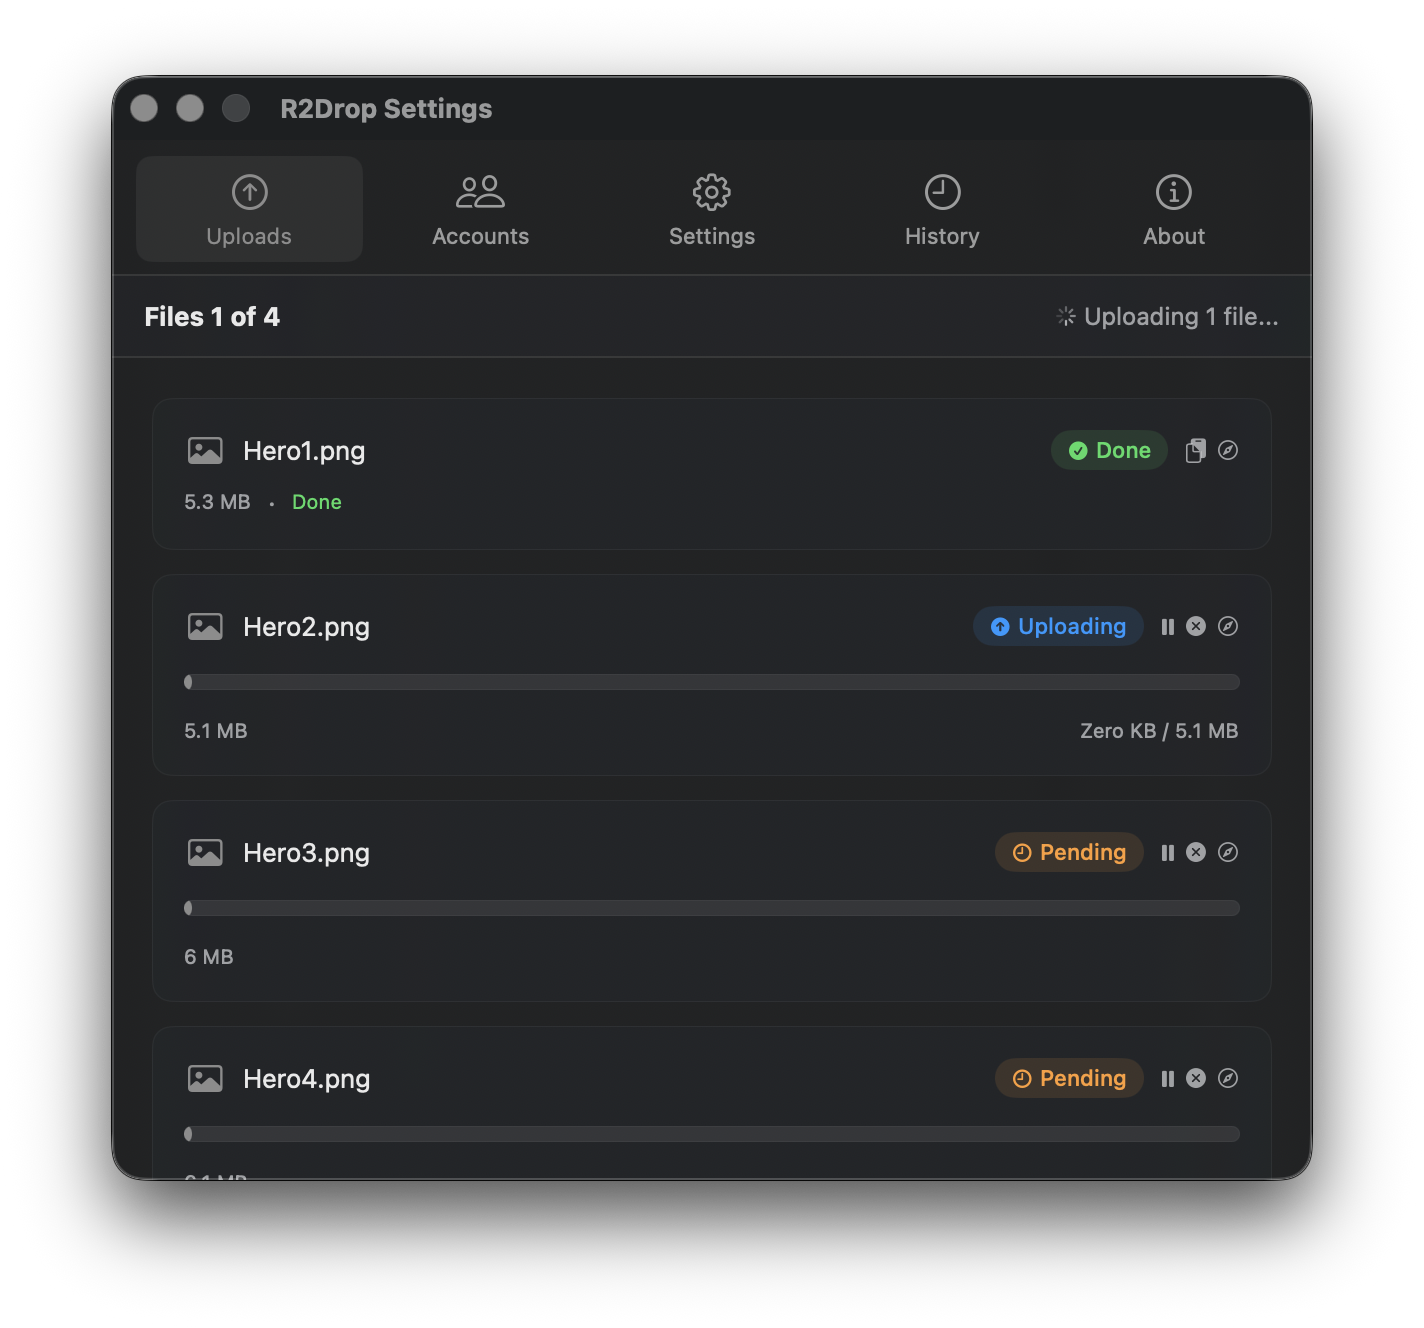
Using the R2Drop macOS app
With R2Drop installed and your R2 account configured, uploading a new asset is three steps:
- In Finder, navigate to the file you want to upload (e.g.,
logo-v3.png) - Right-click the file and select "Send to R2"
- R2Drop uploads the file, applies your configured path prefix (e.g.,
images/), and copies the CDN URL to your clipboard
That CDN URL — https://cdn.yourdomain.com/images/logo-v3.png — is ready to paste into your HTML, CSS, or app config immediately. No tab switching, no manual URL construction.
In R2Drop's account settings, set the Custom Domain field to https://cdn.yourdomain.com. R2Drop uses this to build the correct CDN URL instead of the raw R2 endpoint URL. It also supports per-account path prefixes, so you can have different R2Drop configurations that push to images/, js/, or fonts/ automatically.
Using the R2Drop CLI for build pipelines
For CI/CD workflows — deploying a new JS bundle after a build, for example — R2Drop's CLI integrates cleanly into shell scripts and GitHub Actions:
# Upload an entire dist/ directory to R2 after a build
r2drop upload dist/ \
  --bucket assets-yoursite \
  --prefix "v$(cat package.json | jq -r .version)/" \
  --recursive \
  --header "Cache-Control: public, max-age=31536000, immutable"
The CLI shares the same config file (~/.r2drop/config.toml) and Keychain credentials as the macOS app, so there's no separate authentication setup for headless use.
Performance Considerations
Cloudflare's edge network spans over 300 cities worldwide. Once an asset is cached at an edge node, subsequent requests from nearby visitors are served with single-digit millisecond latency — the response comes from Cloudflare's data center, not your R2 bucket. For most static assets, you'll see Time to First Byte (TTFB) in the range of 5–30ms from Cloudflare's edge.
Compression
Cloudflare automatically applies gzip compression to text-based assets (JS, CSS, HTML, SVG) when a visitor's browser supports it. For Brotli compression — which achieves 10–20% better ratios than gzip for typical JS/CSS — enable it under your domain's Speed → Optimization settings. Brotli is supported by all modern browsers and meaningfully reduces payload sizes for large bundles.
Do not pre-compress files before uploading to R2. Upload uncompressed files and let Cloudflare handle compression on the fly. Pre-compressed uploads bypass Cloudflare's dynamic compression and can cause issues with Accept-Encoding negotiation.
HTTP/2 and connection reuse
Cloudflare serves all custom domain traffic over HTTP/2 by default, which means multiple assets from cdn.yourdomain.com are multiplexed over a single TCP connection. This eliminates the per-connection overhead that was a major penalty for CDN assets in the HTTP/1.1 era. For asset-heavy pages, grouping all static assets under a single CDN subdomain maximizes the benefit of HTTP/2 multiplexing.
Cache warmup
On a cold cache (first request to a new edge PoP), Cloudflare fetches the file from R2 and caches it. For critical assets that need to be globally warm on launch day, you can use a tool like curl or a simple warmup script to pre-request assets from different geographic locations. After that, the cache is warm and R2 is only hit on TTL expiry.
Cost Comparison: R2 + Cloudflare CDN vs. S3 + CloudFront
The financial case for R2 as a CDN is compelling, especially at scale. Here's a concrete comparison for a site serving 10 TB of static assets per month:
AWS S3 + CloudFront
- S3 storage (500 GB): ~$11.50/month
- S3 → CloudFront data transfer (10 TB): ~$90/month (at $0.009/GB tiered)
- CloudFront → internet data transfer (10 TB): ~$850/month (at $0.0085/GB in US/EU)
- CloudFront HTTPS requests (100M): ~$50/month
- Total: ~$1,000/month
Cloudflare R2 + Cloudflare CDN
- R2 storage (500 GB): ~$7.50/month (at $0.015/GB)
- R2 → Cloudflare edge egress: $0 (zero egress fees)
- Cloudflare CDN → internet: $0 (included in Cloudflare's network, free tier covers most usage)
- R2 Class B read operations (100M): ~$36/month
- Total: ~$44/month
That's a 95%+ cost reduction for the same workload. The gap widens as traffic increases, because egress costs on AWS grow linearly while R2 egress stays at zero regardless of volume.
For a detailed breakdown with different traffic profiles, see Cloudflare R2 vs. AWS S3: Full Cost Comparison.
Putting It All Together
The full workflow for using Cloudflare R2 as a CDN for static assets comes down to four steps:
- Create a public R2 bucket in the Cloudflare dashboard
- Connect a custom domain via R2's Custom Domains tab (Cloudflare handles DNS and TLS automatically)
- Set Cache Rules to control TTLs per asset type, and use
Cache-Control: immutableon versioned files - Upload assets using R2Drop — right-click in Finder or run the CLI in your build pipeline — and get the CDN URL copied to your clipboard instantly
Once configured, this setup runs entirely on autopilot. New assets go up via R2Drop, CDN URLs are generated automatically, and Cloudflare handles caching, compression, and global distribution. There's no CDN configuration to maintain, no separate bill for egress, and no infrastructure to manage.
