The Cloudflare dashboard works. But if you're uploading files to R2 more than a few times a week, the dashboard gets in your way fast. You open a browser tab, navigate to the R2 section, select your bucket, click Upload, find the file, wait for the progress bar, then manually copy the URL. Every single time.
For developers who treat R2 as their primary file store — for build artifacts, design assets, client deliverables, or media — that friction adds up. R2Drop is a native macOS application that eliminates the dashboard entirely. It puts R2 uploads into your Finder right-click menu, your menu bar, and your terminal. This guide covers all three methods, plus how to get set up in minutes.
Why the Cloudflare Dashboard Slows You Down
The dashboard is built for configuration, not for rapid file publishing. When you use it for routine uploads, you run into a handful of specific problems.
Context switching kills momentum
Every upload requires leaving your current application, switching to a browser, and navigating at least three pages inside the Cloudflare UI. If you're uploading assets mid-design review or shipping a hotfix, that interruption breaks your flow completely.
No automatic URL copy
After uploading a file, the dashboard does not copy its public URL to your clipboard. You have to find the file in the bucket list, click it, then manually copy the URL — and if your bucket uses a custom domain, the URL shown in the dashboard may not even reflect it.
No real batch support
The dashboard's multi-file upload is functional but clunky. You cannot upload a folder with subfolders while preserving the directory structure. There's no queue, no progress tracking per file, and if your upload fails midway, you start over from scratch.
No CLI for scripting
Cloudflare's official CLI tool, wrangler, supports R2 operations but it is not designed as a fast, scriptable upload utility. There's no built-in way to pipe wrangler into a deploy script that also copies the resulting URL back to your terminal or clipboard.
What R2Drop Does Differently
R2Drop is a native macOS app built around one job: getting files into Cloudflare R2 as fast as possible and giving you a shareable URL immediately. It runs as a menu bar app, so it's always available without being in your face.
Here's what makes it different from the dashboard:
- Six upload methods — Finder right-click, menu bar drag-and-drop, menu bar file picker, the CLI, a URL upload, and a screenshot capture shortcut
- Auto-copies URL to clipboard — the moment an upload finishes, the public URL lands in your clipboard, ready to paste
- Multi-account support — manage multiple R2 buckets or Cloudflare accounts and switch between them instantly
- Rust-powered upload engine — multipart uploads, parallel chunk transfers, and resumable sessions built on the same async engine used in production infrastructure
- Keychain-only credential storage — your API tokens never touch disk or any external server
- Free and open source — MIT license, source available at github.com/superhumancorp/r2drop
Method 1: Right-Click in Finder ("Send to R2")
This is the fastest path for files you're already browsing in Finder. R2Drop installs a Finder Sync Extension that adds a "Send to R2" item to the right-click context menu for any file or folder.
Here's how it works step by step:
- Open Finder and navigate to the file or folder you want to upload
- Right-click (or Control-click) the item
- Hover over the Quick Actions submenu, or look directly for "Send to R2" in the context menu
- Click Send to R2 — if you have multiple accounts configured, a small picker appears so you can choose which bucket to use
- The upload starts immediately in the background; a progress indicator appears in the menu bar icon
- When the upload completes, macOS shows a brief notification and the public URL is automatically copied to your clipboard
For folders, R2Drop preserves the directory structure inside your R2 bucket. A folder named campaign-assets/ containing subfolders will upload exactly as structured, making it easy to organize content by project or date.
The Finder extension requires macOS 13 Ventura or later. If you do not see "Send to R2" in the right-click menu after installing, go to System Settings → Privacy & Security → Extensions → Finder Extensions and make sure R2Drop is checked.
Method 2: Menu Bar Drag and Drop
If you have files on your Desktop or in a Finder window and want to upload without right-clicking at all, the menu bar icon works as a drop target.
- Select one or more files in Finder (hold Shift or Command to select multiple)
- Drag them toward your macOS menu bar
- Drop them directly onto the R2Drop icon in the menu bar
- R2Drop begins uploading all dropped files in parallel
- Each file's URL is copied to the clipboard as it finishes; if multiple files are uploaded, the URLs are placed on the clipboard as a newline-separated list
This method is especially useful when you're working in full-screen apps and need to quickly publish something without switching contexts. The drag target is small, but macOS makes it easy once you know the icon's position.
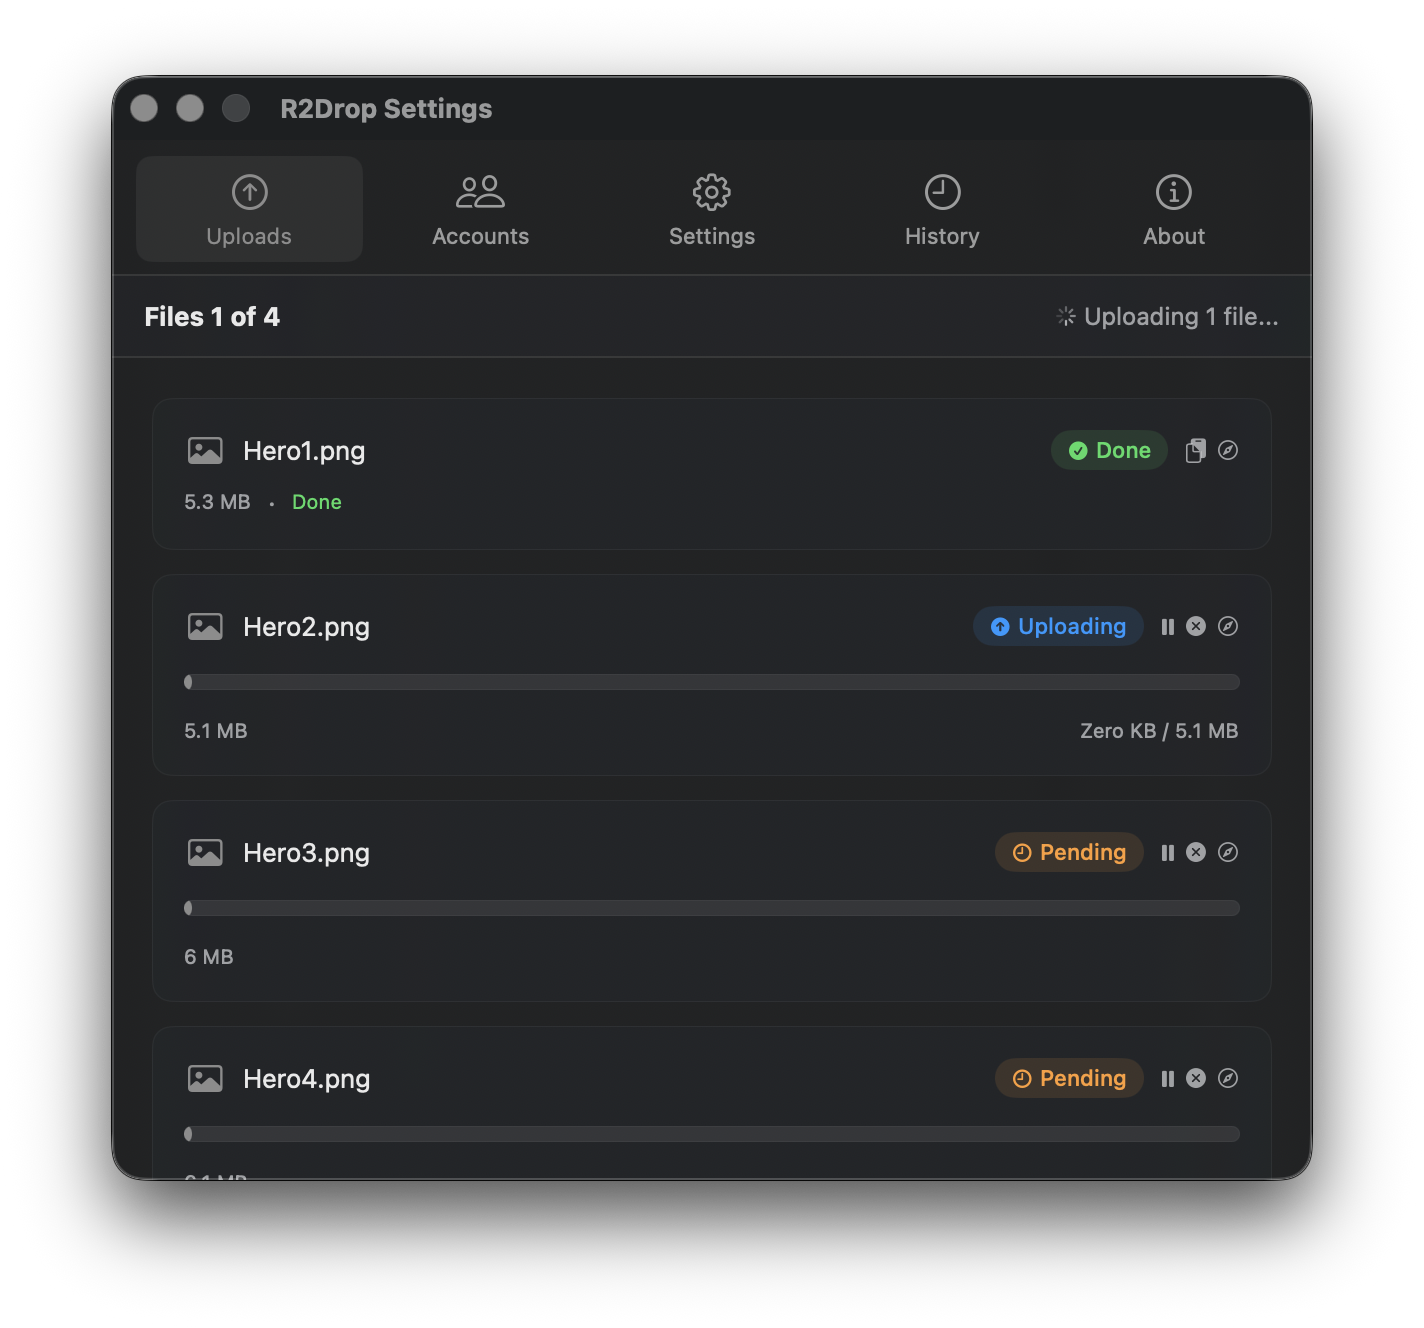
You can also click the menu bar icon to open the R2Drop panel, which shows active upload progress, a history of recent uploads, and quick access to account settings.
Method 3: The CLI (r2drop upload)
R2Drop ships a companion CLI binary called r2drop. It shares the same Rust upload engine and reads from the same config file (~/.r2drop/config.toml) as the macOS app. This means whatever accounts you've configured in the GUI are immediately available in the terminal — no separate CLI setup required.
Install the CLI
If you've installed the macOS app, the CLI binary is bundled inside the app and can be symlinked to your path with a single command:
sudo ln -s /Applications/R2Drop.app/Contents/MacOS/r2drop /usr/local/bin/r2dropAlternatively, you can download the standalone CLI binary for macOS from the GitHub Releases page.
Basic upload
Upload a single file to your default account and bucket:
r2drop upload ./screenshot.pngThe CLI prints the public URL to stdout as soon as the upload completes. You can pipe it directly into your clipboard:
r2drop upload ./screenshot.png | pbcopyUpload to a specific account
If you have multiple accounts configured, pass the account name with the --account flag:
r2drop upload ./build.zip --account work-bucketUpload a folder
Upload an entire directory and preserve its structure inside the bucket:
r2drop upload ./dist/ --prefix releases/v2.1.0/The --prefix flag sets a path prefix inside the bucket. In this example, every file in dist/ lands under releases/v2.1.0/ in your bucket.
Scripting example
Here's a simple shell script that builds a static site, uploads the output, and echoes the base URL:
#!/bin/bash
npm run build
r2drop upload ./out/ --prefix "deploy/$(date +%Y-%m-%d)/"
echo "Deploy complete."
Because r2drop upload exits with code 0 on success and a non-zero code on failure, it integrates cleanly with CI pipelines that check exit codes.
Setup Guide: Installing R2Drop and Adding Your Cloudflare Account
Everything above assumes you've already installed R2Drop and connected a Cloudflare account. Here's how to do that from scratch.
Step 1: Download and install R2Drop
Go to the R2Drop GitHub Releases page and download the latest .dmg file. Open the dmg, drag R2Drop to your Applications folder, then launch it from Applications or Spotlight.
On first launch, macOS may show a warning that the app is from an identified developer outside the App Store. Click Open to proceed. R2Drop is notarized by Apple, so this warning is just the standard Gatekeeper prompt for non-App-Store apps.
Once launched, the R2Drop icon appears in your menu bar. Click it to open the onboarding panel.
Step 2: Create a Cloudflare R2 API token
R2Drop needs a Cloudflare API token with R2 read and write permissions. Here's how to create one:
- Log in to dash.cloudflare.com
- In the left sidebar, click R2 Object Storage
- Click Manage R2 API Tokens in the top-right area of the R2 overview page
- Click Create API Token
- Give the token a name (e.g., "R2Drop Mac")
- Under Permissions, select Object Read & Write
- Optionally, restrict the token to a specific bucket under Specify bucket(s)
- Click Create API Token
- Copy both the Access Key ID and the Secret Access Key — the secret key is only shown once, so save it somewhere safe before closing the page
You'll also need your R2 endpoint URL. It follows the format https://<account-id>.r2.cloudflarestorage.com and is visible on your R2 bucket's settings page in the dashboard.
For a detailed walkthrough of the token creation flow, see the official Cloudflare R2 token documentation.
Step 3: Add your account in R2Drop
Back in R2Drop, click Add Account in the onboarding panel and fill in the following:
- Account Name — a friendly label, e.g., "Personal" or "Client Assets"
- Access Key ID — from the token you just created
- Secret Access Key — from the token you just created
- Bucket Name — the exact name of your R2 bucket
- Endpoint URL — your account-specific R2 endpoint
- Public URL / Custom Domain (optional) — if your bucket has a custom domain or a Cloudflare public access URL, enter it here so shareable links use your domain instead of the raw storage URL
Click Save. R2Drop writes account metadata to ~/.r2drop/config.toml and stores your credentials exclusively in the macOS Keychain under the service name com.superhumancorp.r2drop. Nothing is sent to any R2Drop server.
Step 4: Your first upload
Find any file in Finder, right-click it, and choose Send to R2. Within seconds, the file is live on your R2 bucket and the URL is in your clipboard. Paste it anywhere.
That's the complete setup. From this point forward, uploading to Cloudflare R2 from macOS is a single right-click — or a single terminal command.
Frequently Asked Questions
Does R2Drop work with private buckets?
Yes. R2Drop uses the S3-compatible API to upload files regardless of whether your bucket is public or private. If your bucket is private, R2Drop will still upload successfully — but the URL it copies to your clipboard will only be accessible if you have public access or a signed URL configured. For most developer use cases, setting up a Cloudflare public bucket or a custom domain with public access gives you shareable links automatically.
Can I use R2Drop with multiple Cloudflare accounts?
Yes. R2Drop supports an unlimited number of accounts. Each account maps to a specific bucket and set of credentials. You can switch between accounts from the menu bar panel or specify one per-upload using the --account flag in the CLI. See the multi-account setup guide for a detailed walkthrough.
Is R2Drop safe? Where do my credentials go?
Your Cloudflare API credentials are stored only in the macOS Keychain. They are never written to a plain-text file, never transmitted to R2Drop's servers, and never included in logs. Files you upload go directly from your Mac to Cloudflare's servers over HTTPS — they do not pass through any R2Drop infrastructure. The source code is fully open and auditable at github.com/superhumancorp/r2drop.
What macOS version is required?
R2Drop requires macOS 13 Ventura or later. The Finder extension specifically uses the Finder Sync Extension API introduced in macOS 10.10, but the app targets macOS 13 as its minimum deployment target to ensure full SwiftUI support and modern system APIs.