
If you work across multiple projects, clients, or Cloudflare organizations, you almost certainly need to upload files to more than one Cloudflare R2 bucket. R2Drop is designed for exactly this workflow. It supports unlimited named accounts, and switching between them takes a single click in the menu bar or a single flag in the CLI — no re-entering credentials, no switching browser profiles.
How R2Drop Handles Multiple Accounts
Each account in R2Drop is a named configuration that maps to a specific Cloudflare R2 bucket. Accounts are stored in ~/.r2drop/config.toml, while credentials (your Access Key ID and Secret Access Key) are stored securely in the macOS Keychain under the service identifier com.superhumancorp.r2drop. This means your API keys are never written to disk in plaintext — not even in the config file.
You can have as many accounts as you need. Common setups include:
- One account per client (freelancers and agencies)
- One account per environment:
dev,staging,production - One account per project with different bucket regions or custom domains
- A personal bucket plus a work bucket on the same Mac
Adding a New Account via the macOS App
To add a second (or third, or tenth) Cloudflare R2 account in the R2Drop macOS app:
- Click the R2Drop icon in your menu bar
- Open Preferences → Accounts
- Click the + Add Account button
- Fill in the account details (see fields below)
- Click Save
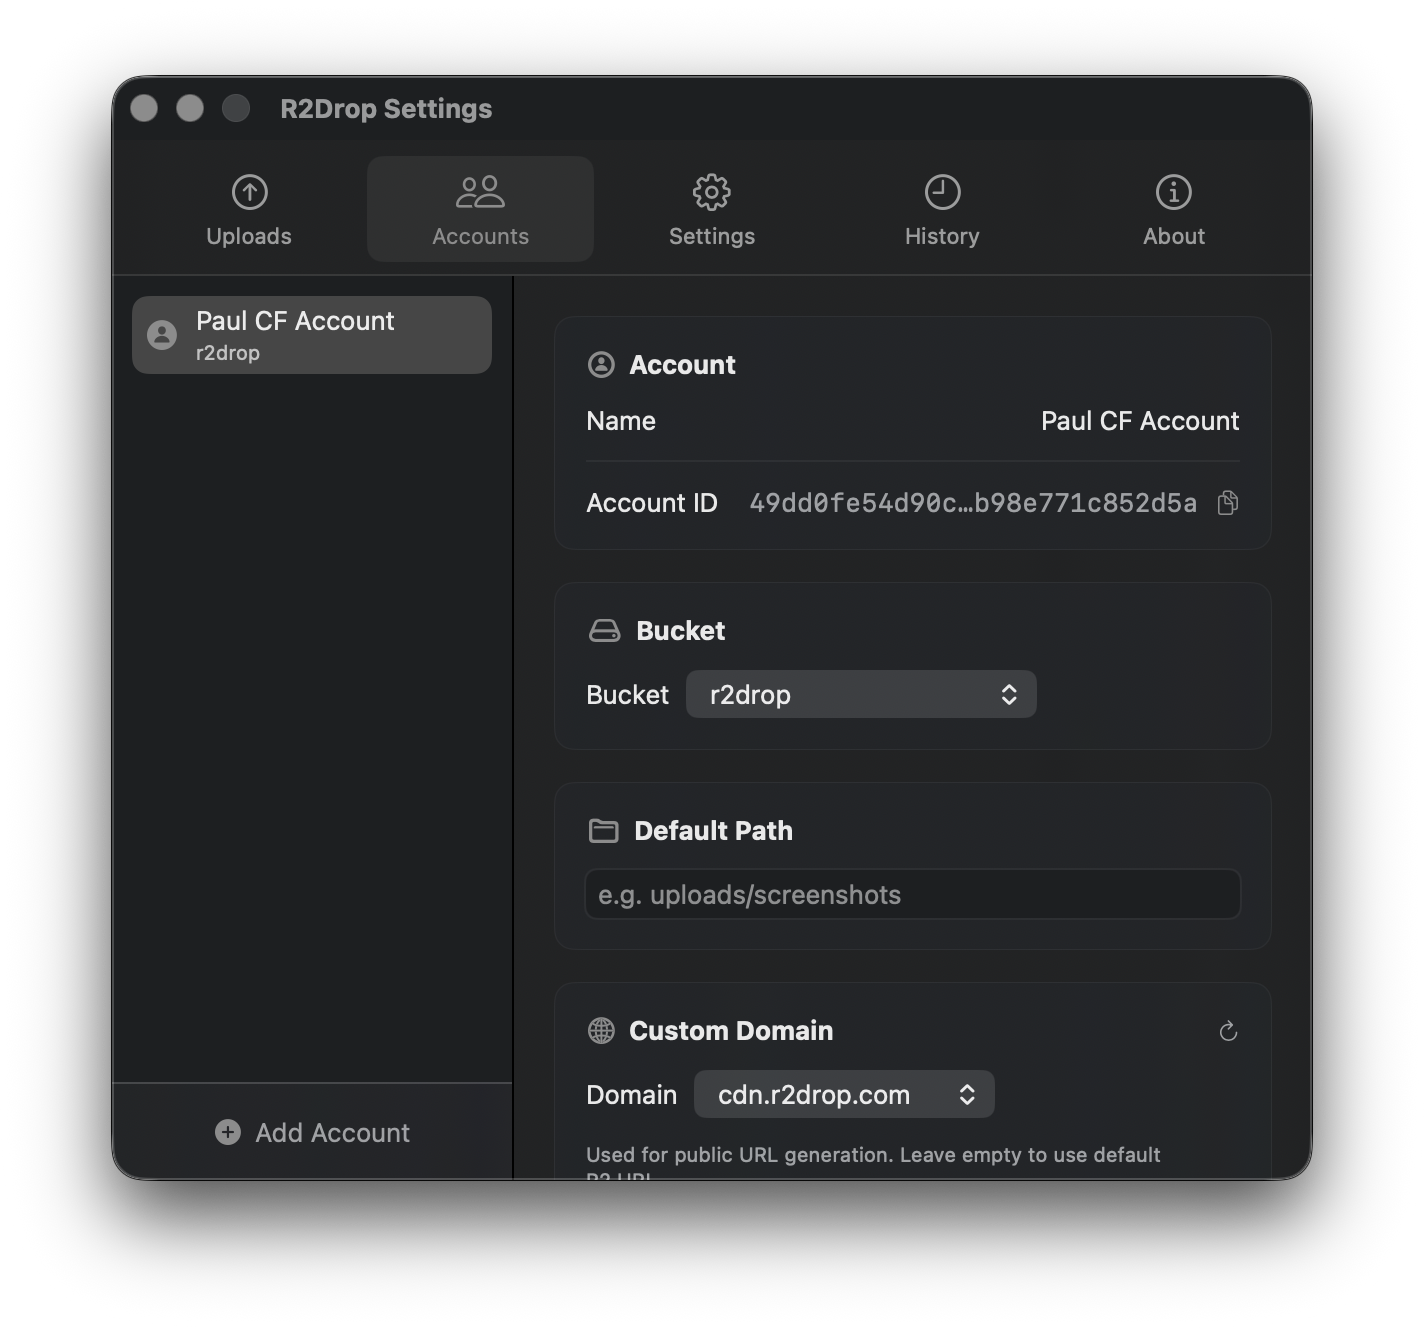
Account Fields
Each account has the following configuration fields:
- Account Name — a unique, friendly label used to identify this account in the menu bar and CLI (e.g., "Client A — CDN" or "Personal Backup")
- Access Key ID — your Cloudflare R2 API token's access key
- Secret Access Key — your Cloudflare R2 API token's secret key (stored in Keychain)
- Bucket Name — the exact name of the R2 bucket to upload to
- Endpoint URL — the R2 endpoint for this Cloudflare account (format:
https://<account-id>.r2.cloudflarestorage.com) - Path Prefix (optional) — a folder prefix that all uploads from this account will be placed under (e.g.,
uploads/or2026/media/) - Custom Domain (optional) — if your bucket is served through a Cloudflare custom domain, enter it here so that shareable links use your domain instead of the R2 storage URL
"You can create separate R2 API tokens for each account with minimal permissions — only the specific bucket they need access to. This follows the principle of least privilege and limits exposure if a token is ever compromised."
Switching the Active Account
Once you have multiple accounts configured, you can switch the active account (the one used when you right-click a file in Finder and select "Send to R2") in two ways:
Via the menu bar
Click the R2Drop menu bar icon to open the dropdown. At the top of the dropdown, you'll see your accounts listed with a checkmark next to the active one. Click any account name to make it active. The change takes effect immediately — your next upload will go to the newly selected account's bucket.
Via the CLI with --account
When using the R2Drop CLI, pass the --account flag to target a specific account regardless of which one is set as active in the app:
r2drop upload assets/hero.jpg --account client-a-cdn
r2drop upload report.pdf --account work-production
This is particularly useful in scripts where you always want to target a specific account, independent of whatever the macOS app has set as the default.
Organizing Uploads with Path Prefixes
Path prefixes let you organize uploads automatically without thinking about folder structure every time. For example, if you're uploading marketing assets for a client, you might set a prefix of clients/acme/assets/. Every file uploaded to that account will automatically go into that folder in the bucket.
You can also include date variables in prefixes. For example, a prefix of uploads/2026/ keeps uploads organized by year. Combined with meaningful account names, path prefixes eliminate the need to manually specify upload destinations for routine workflows.
Using Custom Domains Per Account
Each account can have its own custom domain. This is useful when different clients or projects use different CDN domains served from their R2 buckets. When a custom domain is configured, R2Drop automatically generates shareable links using that domain instead of the *.r2.cloudflarestorage.com storage URL.
For example, if your account has custom_domain = "https://cdn.client-a.com" and you upload logo.png, R2Drop copies https://cdn.client-a.com/logo.png to your clipboard — the correct, production-ready URL.
Editing and Removing Accounts
To edit an existing account, open Preferences → Accounts in the R2Drop app, click the account name, make your changes, and click Save. Note that changing the Secret Access Key updates the entry in your macOS Keychain.
To remove an account, click the account in the Preferences panel and click Delete Account. R2Drop will remove both the config.toml entry and the Keychain credential for that account. This does not affect the R2 bucket itself — only the local configuration.
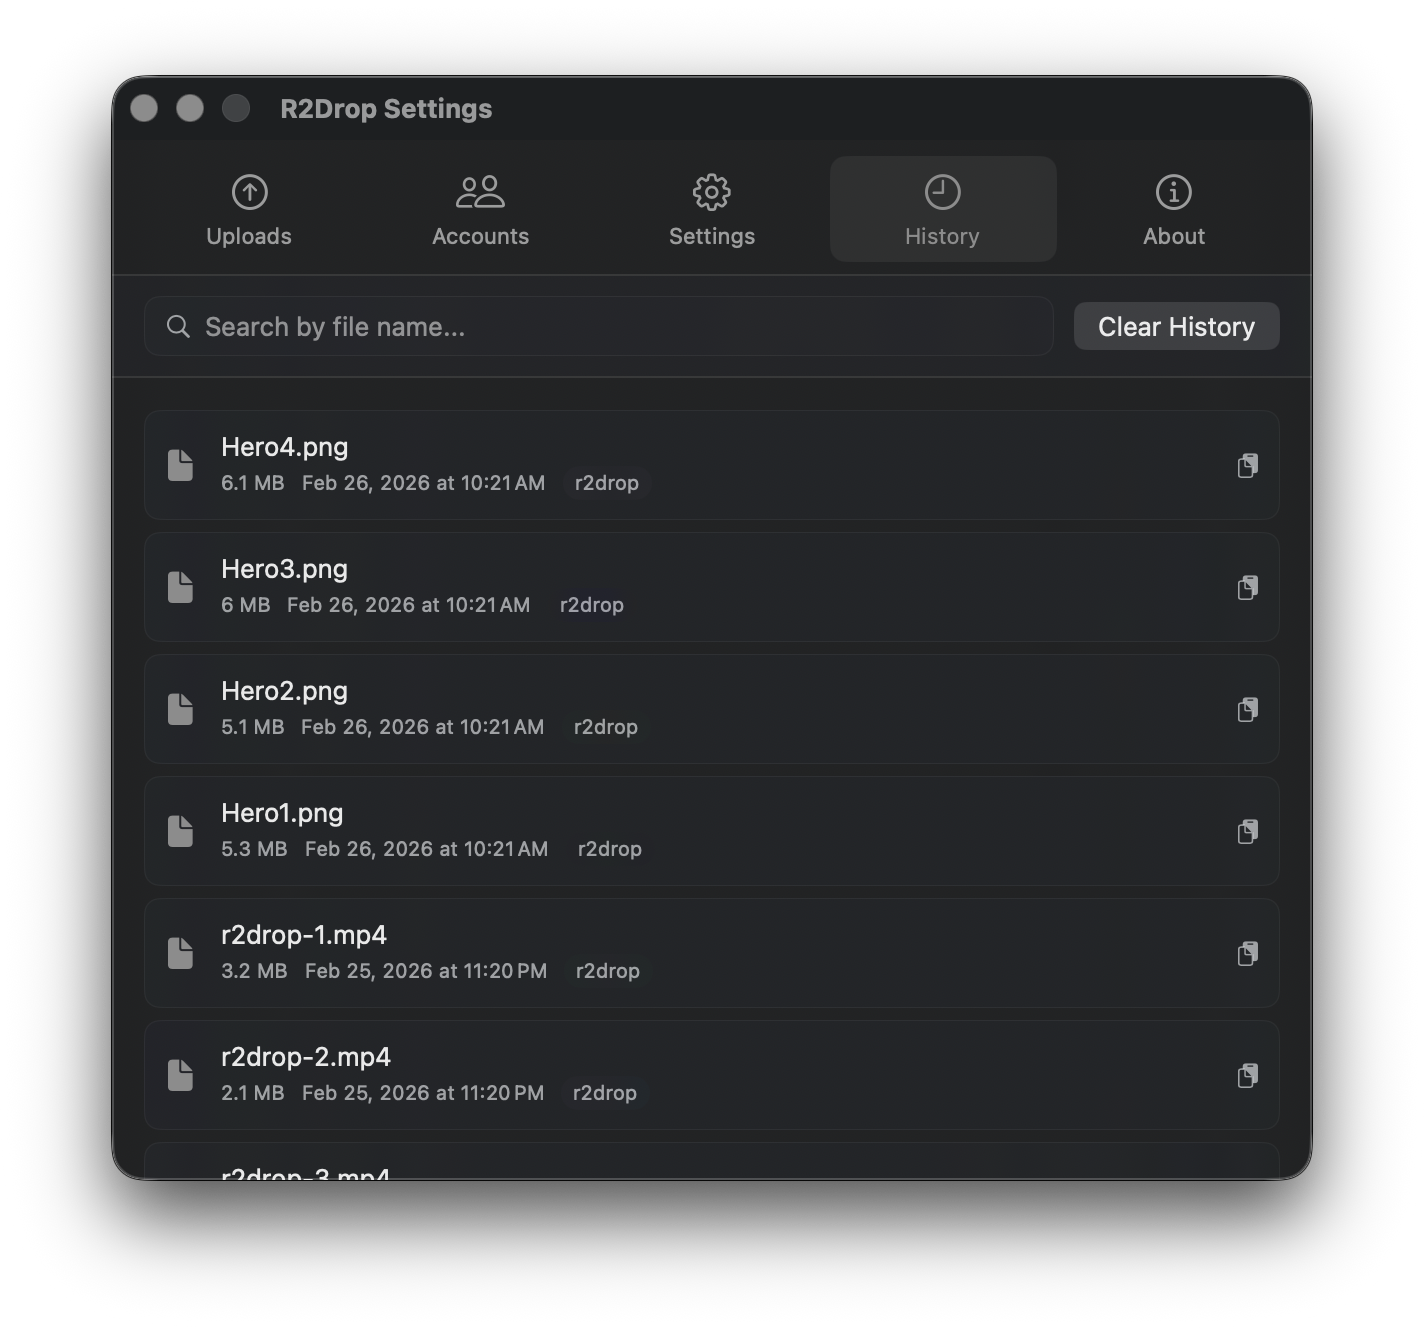
Viewing Per-Account Upload History
R2Drop keeps a full upload history in ~/.r2drop/history.db. The history panel in the menu bar dropdown can be filtered by account, so you can quickly see all uploads to a specific bucket. Each entry shows the filename, object key, size, upload time, and URL. Clicking any entry copies the URL to your clipboard.
Config File Reference
The full config.toml format for multiple accounts looks like this:
[accounts.personal]
bucket = "my-personal-bucket"
endpoint = "https://abc123.r2.cloudflarestorage.com"
custom_domain = "https://cdn.example.com"
path_prefix = "uploads/"

[accounts.client-a]
bucket = "client-a-assets"
endpoint = "https://def456.r2.cloudflarestorage.com"
custom_domain = "https://cdn.client-a.com"
path_prefix = "media/"

[accounts.work-production]
bucket = "work-prod-bucket"
endpoint = "https://ghi789.r2.cloudflarestorage.com"

[defaults]
account = "personal"
The [defaults] section specifies which account is used by default when no --account flag is passed to the CLI. In the macOS app, the active account can differ from this default and is stored separately.
Security Considerations
R2Drop never stores API credentials in config.toml. All Access Key IDs and Secret Access Keys are stored exclusively in the macOS Keychain when using the desktop app. When editing config.toml manually for use with the CLI (e.g., in a CI/CD environment), you can include credentials directly in the file — but make sure that file is gitignored and not committed to version control. Consider using environment variables or secrets management tools for production CI pipelines instead.
Conclusion
R2Drop makes managing multiple Cloudflare R2 accounts straightforward. Whether you're a freelancer juggling client buckets, a team managing dev/staging/production environments, or a developer with personal and work accounts on the same Mac — unlimited named accounts, Keychain-secured credentials, and one-click switching keep things simple.
